Mechanical Keyboard Parts Explained: A Visual Guide
This article contains affiliate links. If you buy through them, I earn a small commission at no extra cost to you. I only recommend keyboards I’ve actually tested. As an Amazon Associate I earn from qualifying purchases.
Pop open a mechanical keyboard and you’re looking at maybe a dozen distinct components stacked on top of each other, most of which marketing departments don’t want you thinking too hard about. That’s a shame. Once you actually understand the mechanical keyboard parts working under your fingertips, two things change. You buy smarter. And you stop dropping $200 on the wrong upgrade.
I’ve torn down north of a hundred boards over the years. Cheap plastic slabs, $400 group buys, prebuilts from Keychron, Logitech, Razer, Glorious, and a dozen smaller brands. Same pattern every time. The parts matter. The marketing rarely does. This guide walks through every layer of a mechanical keyboard, what each piece actually does, and which ones are worth paying up for versus which ones you can safely ignore.
TL;DR Mechanical Keyboard Parts at a Glance
If you only read one section, read this one. Here’s which mechanical keyboard parts matter most depending on what you actually do at your desk.
| Your Use Case | The Part That Moves the Needle Most | What to Actually Look For | Why |
|---|---|---|---|
| Office or shared workspace | Switches | Silent linears (Cherry MX Silent Red, Gazzew Bobas) plus thick PBT caps | Nobody around you cares about thock. They care that you’re not clacking. |
| Long-day typist or writer | Stabilizers and keycaps | Pre-lubed stabs, PBT keycaps in OEM or Cherry profile | Rattly spacebars and shiny ABS caps wear you down fast. |
| Competitive gamer | PCB and switches | 8000Hz polling, hall-effect or fast linears (Gateron Magnetic Jade, Cherry MX Speed) | Polling rate and switch travel matter for response time, not RGB. |
| First mech buyer | The whole board (hot-swap especially) | Sub-$130 hot-swap board (Keychron V-series, Epomaker, NuPhy) | Hot-swap means you can change switches later without soldering. Future-proof. |
| Modder or enthusiast | Plate, gaskets, case | Gasket-mounted aluminum case, FR4 or POM plate, foam set included | This is where the sound actually lives. Switches are secondary. |
| Budget buyer ($60 to $100) | Switches (because the rest will be average) | Any decent Gateron or KTT switch in a hot-swap board | Cheap boards are mostly fine. The switches are usually the weak link. |
Quick read: most people overspend on the case and underspend on the stabilizers and keycaps. Fix that and your board will already feel like a different machine.
The Big Picture: How a Mechanical Keyboard Is Built
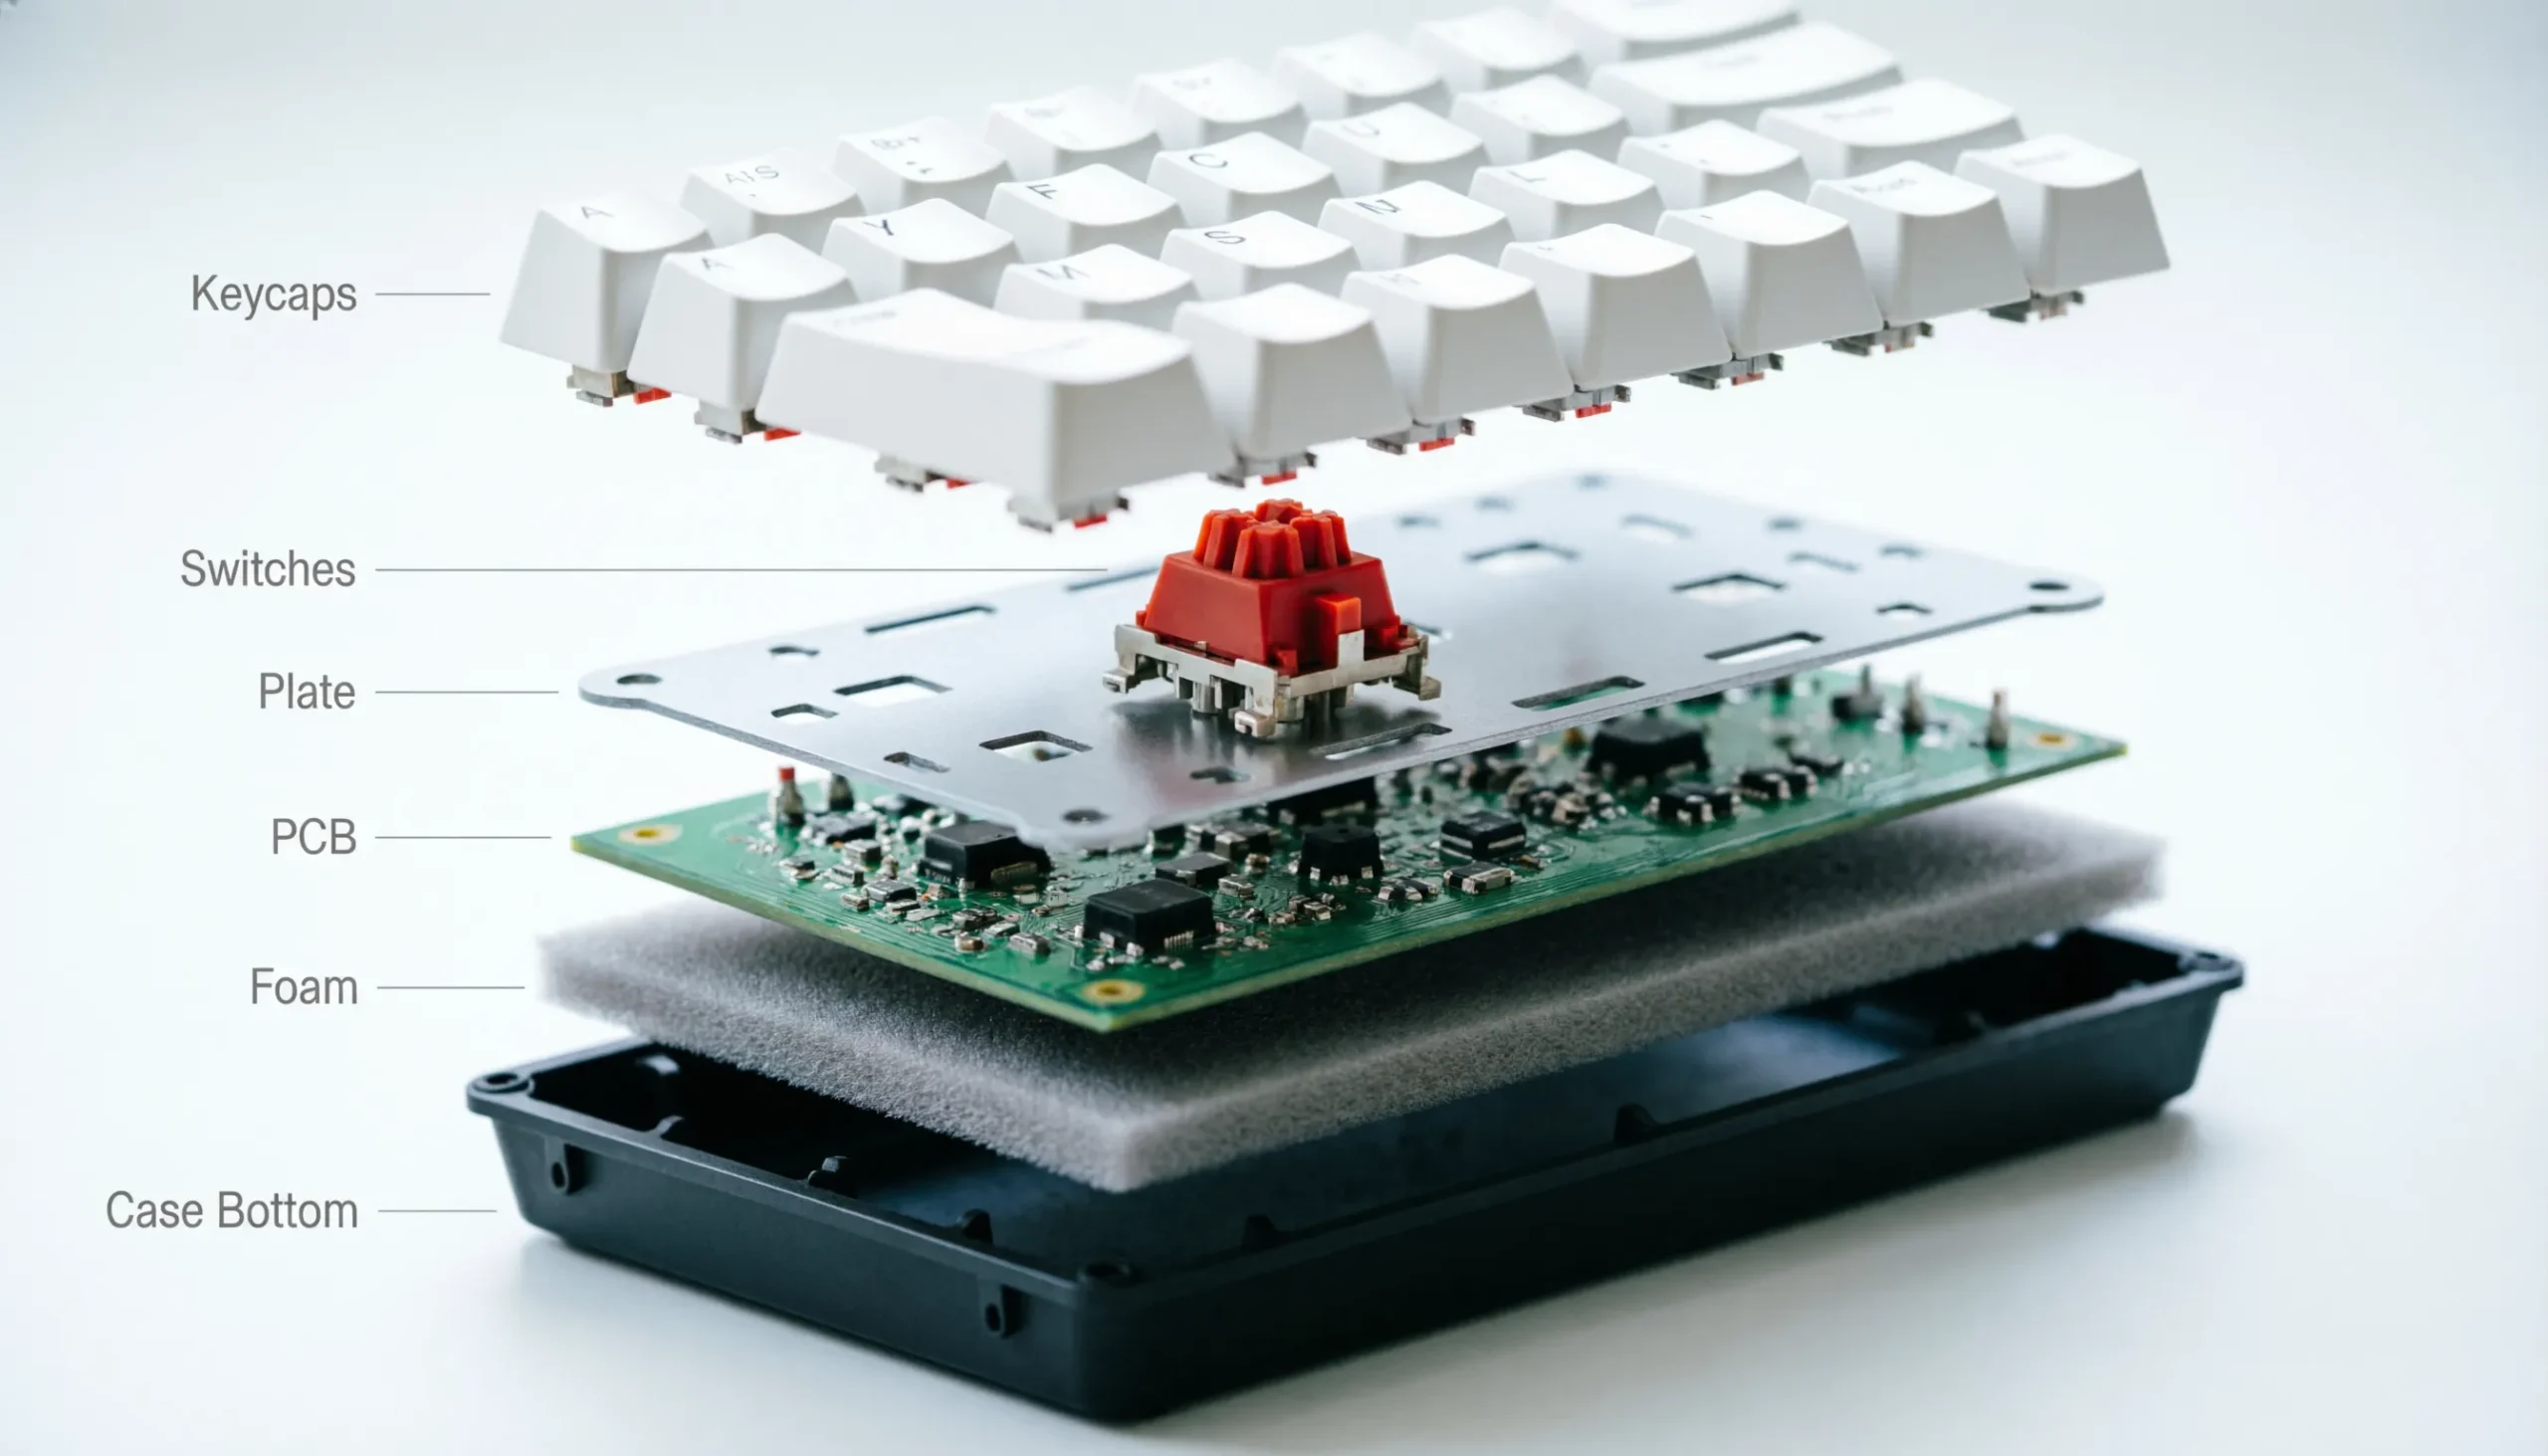
Strip a board to its skeleton and you’ve got roughly seven layers, stacked top to bottom:
- Keycaps, what your fingers actually touch
- Switches, the mechanical mechanism under each cap
- Stabilizers, supports for the longer keys (spacebar, shift, enter)
- Plate, the metal or plastic sheet the switches snap into
- PCB, the printed circuit board that reads keystrokes
- Foam and gaskets, dampening material and mounting cushions
- Case, top and bottom housing holding it all together
Add a daughterboard, a USB-C connector, screws, and maybe some weight plates on premium boards, and that’s the whole machine. Every one of these mechanical keyboard parts changes how the board sounds, feels, and lasts. Some changes are dramatic. Some you’d need a sound meter to notice. I’ll be honest about which is which.
The Case: The Most Overrated and Underrated Part at Once
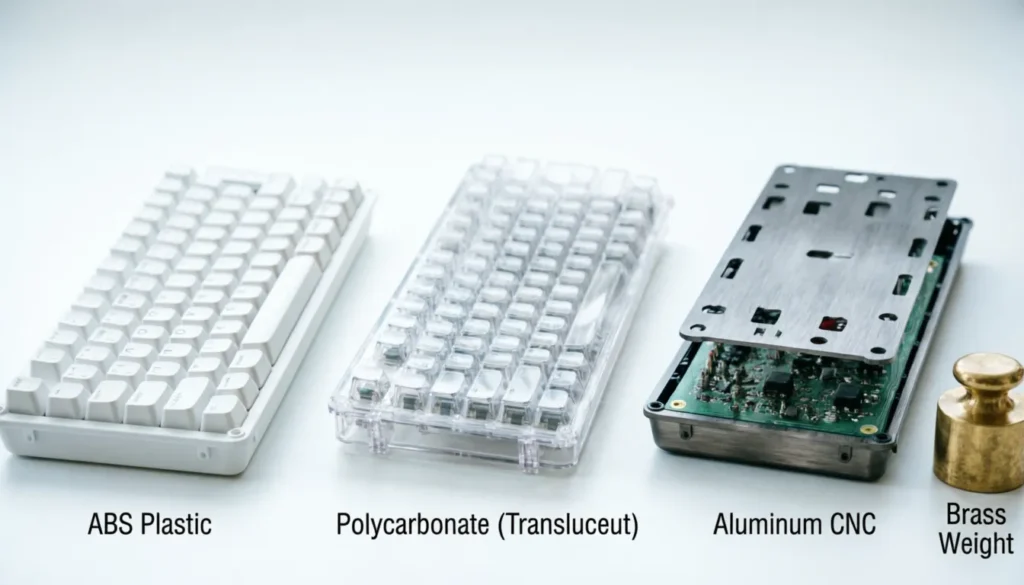
The case is the shell. Top and bottom housing, sometimes with a weight plate inside. It’s also the part people obsess over for the wrong reasons.
Common case materials:
- ABS plastic: light, cheap, hollow-sounding. Standard on sub-$100 boards.
- Polycarbonate (PC): softer sound, slight flex, a favorite of enthusiasts.
- Aluminum (CNC or extruded): heavy, premium feel, classic high-end pick.
- Brass and copper: usually as weights inside aluminum cases. Adds heft, deepens sound.
- Wood and acrylic: niche, mostly aesthetic.
Here’s the catch with aluminum: a poorly designed aluminum case sounds worse than a well-designed plastic one. Mass alone doesn’t make a board sound good. The internal architecture (foam, mounting style, plate choice) matters at least as much. I’ve reviewed $300 aluminum boards that pinged like a tuning fork and $90 plastic ones that sounded warm and full. Heaviness is not a quality signal.
What the case actually controls is resonance. Empty space inside the housing equals echo. Foam, weight, and dense materials kill echo. That’s the whole physics of it.
The Mounting Plate
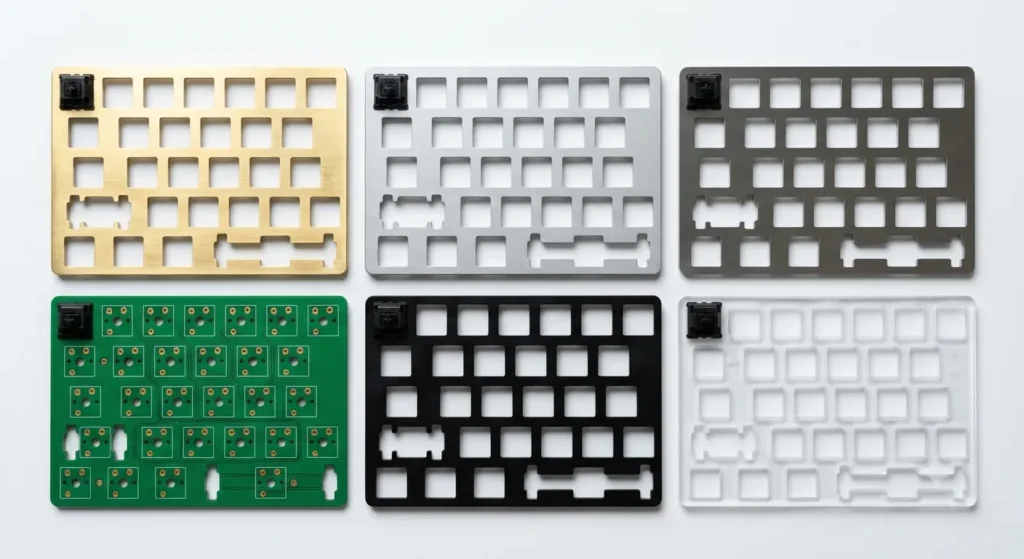
The plate is the thin sheet, usually 1.5mm thick, that the switches clip into. It sits between the keycaps and the PCB and gives the board its rigidity.
Plate materials, ranked roughly by stiffness:
- Brass: stiff, bright, high-pitched sound
- Aluminum: the default, balanced
- Steel: stiffer than aluminum, also brighter
- FR4 (the same material as a PCB): softer, slightly hollow
- POM: soft, deep, creamy sound
- Polycarbonate: softest, most flex, deepest sound
- Carbon fiber: stiff but oddly soft sound, rare
Plate choice is one of the few parts where a swap actually changes sound dramatically. Same switches, same caps, same case. Drop in a POM plate instead of aluminum and the board sounds noticeably deeper. If you’re chasing a specific sound profile, this is where to look before you start lubing switches.
The PCB: The Brain Behind Your Keystrokes
The PCB (printed circuit board) is the green or black board with all the traces and components. Every switch sits on top of it. It’s also where most of the spec sheet features people argue about live.
Things on the PCB worth understanding:
- Hot-swap sockets: let you change switches without soldering. Worth paying for. Always.
- Per-key RGB LEDs: for the lightshow. Fun, not a buying reason.
- Polling rate: how often the board reports to your PC. 1000Hz is fine for almost everyone. 4000Hz and 8000Hz exist; the latency difference is real but tiny.
- NKRO (N-key rollover): registers every key you press simultaneously. Standard on any modern mech.
- QMK and VIA support: open-source firmware for remapping keys. If you tinker, this matters a lot.
One contrarian take: 8000Hz polling is marketed as a competitive edge, but the latency improvement over 1000Hz is roughly 0.5ms. Your monitor, your network, and your reflexes all introduce way more delay than that. If a brand is leaning on 8000Hz as a selling point, they’re betting you don’t read closely.
Switches: The Part Everyone Cares About (Sometimes for the Wrong Reasons)
This is the heart of the keyboard. Switches determine how a key feels, how it sounds, and how it ages. There are three main families.
The Three Switch Types
| Type | Feel | Best For | Example Switches |
|---|---|---|---|
| Linear | Smooth top-to-bottom, no bump | Gaming, fast typists | Cherry MX Red, Gateron Yellow, Krytox-lubed customs |
| Tactile | Noticeable bump partway down | Typing, programming, writers | Cherry MX Brown, Boba U4T, Holy Pandas |
| Clicky | Tactile bump plus audible click | People who love the sound, hate officemates | Cherry MX Blue, Kailh Box White |
A Gateron Yellow is one of the best linear switches under a dollar, period. It outperforms switches that cost three times as much in stock form. Cherry MX Browns get a lot of flak from enthusiasts for being a weak tactile bump. They’re not wrong, but for a beginner moving up from a membrane board, Browns are a perfectly reasonable starting point.
What Lubing a Switch Actually Means
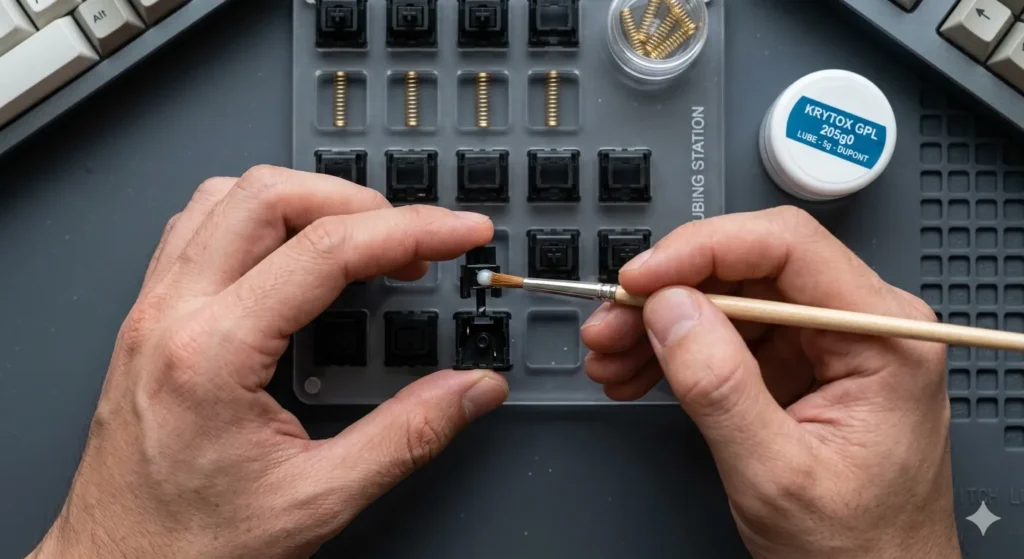
Apply a thin film of grease (Krytox 205g0 is the standard) to the stem rails and spring of a switch and you remove most of the friction and scratchiness. The switch feels smoother and sounds deeper. It’s tedious, takes about an hour for a full board, and is one of the biggest perceptible upgrades you can make for $20 in supplies.
Most premium switches now come pre-lubed from the factory. The quality varies. You can usually feel which ones got rushed.
Stabilizers: The Unsung Hero (or Villain) of Every Mechanical Keyboard
Stabilizers, or stabs, sit under the long keys: spacebar, shift, enter, backspace. Their job is to keep the keycap level when you press it off-center. A bad stab makes a great board feel cheap.
Stab types you’ll run into:
- Plate-mount stabilizers: clip into the plate. Easier to swap, slightly worse feel. Common on prebuilts.
- Screw-in stabilizers: bolt directly to the PCB. Best feel, what every enthusiast uses.
- Cherry-style: the standard, used by basically everyone now.
- Costar: older design with metal bars, fiddly to install, mostly retired.
If your spacebar rattles like a maraca, you don’t have a switch problem. You have a stab problem. The fix is a stab mod: lube the wire, add a tiny bit of dielectric grease to the housing, sometimes do a holee mod or band-aid mod to dampen the bottom-out. A well-modded set of stabs is the single biggest jump in perceived quality on most cheap boards. I’d skip almost any other mod before doing this one.
Keycaps: What You Actually Touch All Day
Keycaps get judged on two things: material and profile.
Material
- ABS plastic: smooth, sometimes a little slick. Develops a shine where your fingers land most. Most factory caps.
- PBT plastic: coarser texture, denser sound, doesn’t shine. The enthusiast default.
PBT is almost always the better long-term buy. ABS isn’t bad, and many premium doubleshot ABS sets sound fantastic, but if you type for hours every day, those shiny spots on your WASD and E keys will show up within months.
Profile (the shape of the cap)
| Profile | Shape | Feel |
|---|---|---|
| OEM | Slightly tall, sculpted rows | The default on most prebuilts. Familiar to everyone. |
| Cherry | Shorter, sculpted | Lower than OEM. Many enthusiasts prefer it. |
| SA | Tall, heavily sculpted, retro look | Beautiful, polarizing, takes adjustment. |
| XDA and DSA | Flat, uniform across rows | Looks clean, harder to touch-type fast on. |
| MT3 | Tall, deep dish | Cupped feel, fans love it. |
Honestly, profile is mostly preference. You’re not going to type faster on Cherry profile than OEM. You might find one more comfortable. Try before you commit to a $120 keycap set.
Foam, Gaskets, and Internal Dampening
Inside a modern keyboard you’ll often find layers of foam: case foam between the PCB and bottom housing, PE foam between the PCB and plate, and sometimes a layer above the switches. They kill echo and reduce ping.
Mounting styles, briefly:
- Tray mount: PCB and plate screw directly to the bottom case. Stiff, sharp sound. Used in most budget boards.
- Top mount: plate screws into the top case. Cleaner sound, more refined.
- Gasket mount: plate sandwiched between rubber or silicone gaskets. Softer typing feel, deeper sound. The current enthusiast favorite.
- O-ring mount: plate suspended by o-rings. Similar idea to gasket, different execution.
Gasket-mounted boards are the trend for a reason. They feel softer to bottom out on and sound deeper. They’re not magic, though. A poorly tuned gasket board can feel mushy. A well-tuned tray-mount board can feel great. The mounting style sets the ceiling, not the floor.
The Small Stuff: Cables, Daughterboards, USB Ports
A few mechanical keyboard parts get ignored because they’re not glamorous, but they shape your experience anyway.
- Daughterboard: a small secondary PCB holding the USB-C port. Decouples cable strain from the main PCB. Worth having.
- USB-C ports: every modern board uses USB-C. Avoid micro-USB unless you’re getting a steal on an older model.
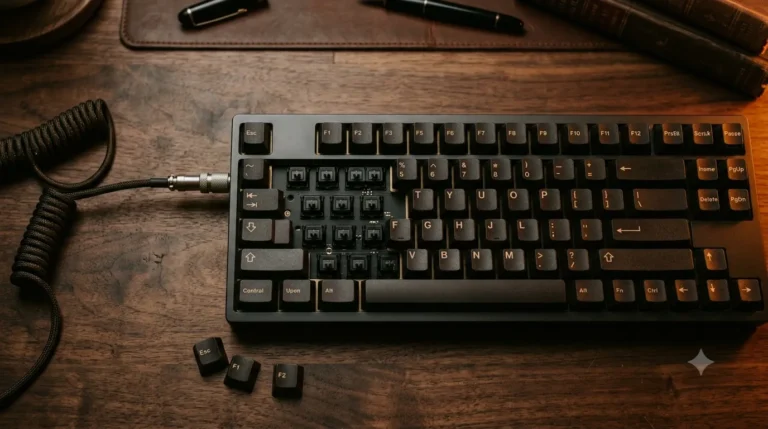
- Coiled aviator cables: those fancy braided cables with an aviator-style connector midway. Pure aesthetics. Functionally identical to a $10 cable. Buy if you love how they look. Skip if you don’t.
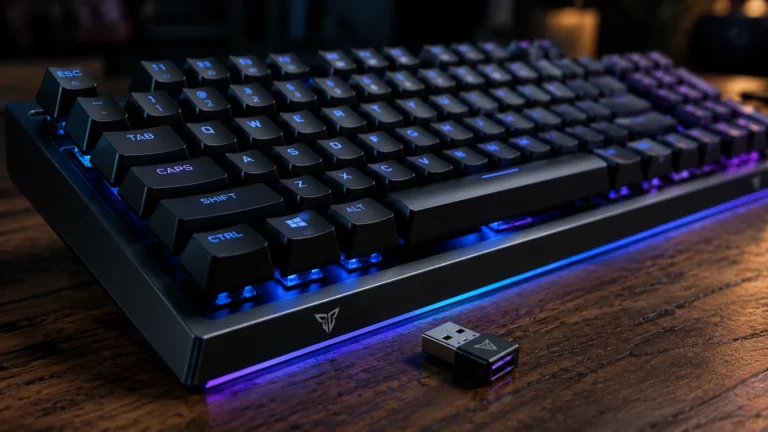
- Wireless: Bluetooth or 2.4GHz. Bluetooth introduces a few ms of latency; 2.4GHz dongles are nearly indistinguishable from wired. For gaming, go wired or 2.4GHz, not Bluetooth.
Which Mechanical Keyboard Parts Should You Upgrade First?
If you already own a board and want to improve it without buying a new one, here’s the order I’d actually do it in.
| Upgrade Priority | Part | Approximate Cost | Impact |
|---|---|---|---|
| 1st | Stabilizer mod (lube and band-aid) | $15 to $25 | Huge. Fixes the rattly spacebar issue plaguing 90% of boards. |
| 2nd | Keycaps (PBT set) | $40 to $80 | Big. Changes look, feel, and sound noticeably. |
| 3rd | Switch swap (if hot-swap) | $30 to $80 | Big. Changes typing feel completely. |
| 4th | Switch lube | $20 in supplies plus 1 to 2 hours | Medium to big. Smoother feel, deeper sound. |
| 5th | Foam mod | $5 to $15 | Small to medium. Kills hollow echo on cheap boards. |
| 6th | Tape mod (painter’s tape on PCB back) | $2 | Small. Deepens sound on some boards, neutral on others. |
| 7th | New case | $80 to $200 and up | Variable. Only worth it if you’ve already done everything else. |
Notice the case is dead last. That’s deliberate. Until you’ve sorted out the stabs, caps, and switches, swapping a case is throwing money at the wrong problem.
Common Mistakes With Mechanical Keyboard Parts
A few things I see repeatedly that cost people money or satisfaction:
- Buying based on the case material first. Aluminum doesn’t equal good. Internal design matters more.
- Ignoring the keycaps that come with the board. Stock ABS caps on a $200 board will still shine. Budget for PBT replacements if longevity matters.
- Chasing exotic switches before fixing the stabs. Rattly stabs sabotage even the best switches.
- Confusing loud with good. Thocky and clacky get marketed hard. Some of the best-feeling boards I’ve used are unremarkable to listen to.
- Overpaying for marginal polling rate gains. 1000Hz is enough for 99% of users. Don’t let 8K polling be why you spent another $80.
- Skipping hot-swap to save $20. You’ll wish you hadn’t the moment you want to try different switches.
FAQ
What are the main parts of a mechanical keyboard? Case (top and bottom housing), plate, PCB, switches, stabilizers, keycaps, and internal dampening (foam or gaskets). Premium boards add daughterboards, weight plates, and sometimes additional acoustic layers.
Which mechanical keyboard parts have the biggest impact on sound? Plate material, case design, and internal foam matter most for sound. Switches matter less than people think. A POM or polycarbonate plate in a foam-lined case will sound dramatically different from a brass plate in an empty aluminum shell, even with identical switches.
Are PBT keycaps really worth the upgrade? Yes, if you type a lot. PBT doesn’t shine the way ABS does after months of use, and most enthusiasts prefer the texture. The sound difference is real but subtle. The durability is the bigger win.
Do I need a hot-swap PCB? If there’s any chance you’ll want to try different switches later, yes. Soldering switches isn’t hard, but it’s also not fun. Hot-swap removes the only major barrier to experimenting.
What’s the difference between gasket-mount and tray-mount? Tray mount screws the PCB directly to the case for a stiffer, sharper sound. Gasket mount cushions the plate between rubber strips for a softer typing feel and deeper sound. Gasket is the current enthusiast preference, but a well-built tray-mount board can absolutely hold its own.
Are expensive switches worth it over Gateron Yellows or KTT Reds? Sometimes. Most premium switches are smoother and pre-lubed better than budget options. But the gap between a $0.30 Gateron Yellow and a $0.80 Gateron Oil King is smaller than the gap between an unmodded board and a modded one. Spend money on stabilizer work and good keycaps first.
Which mechanical keyboard parts wear out the soonest? ABS keycaps shine first. Stabilizers can dry out and start rattling over time. Switches themselves are rated for 50 to 100 million presses. They outlast everything else.
The Bottom Line
Most of what marketing tells you about mechanical keyboard parts is noise. The truth is simpler. Pick a board with a hot-swap PCB so you can change switches later. Make sure the stabilizers are decent or budget an afternoon to fix them yourself. Get PBT keycaps that match your hands. Don’t spend extra on aluminum just because it sounds premium. What’s inside the case matters more than what the case is made of.
Do those four things and your $130 board will feel better than most $300 prebuilts. I’ve tested both. The math works out.
This article contains affiliate links. If you buy through them, I earn a small commission at no extra cost to you. I only recommend keyboards I’ve actually tested. As an Amazon Associate I earn from qualifying purchases.

I’ve torn down, lubed, and rebuilt several hundred keyboards — from $20 membranes to $800 enthusiast boards. I review them honestly, even when “honestly” means telling you to skip the one with the bigger marketing budget.