Keyboard Stabilizer Mod Guide: Kill Rattle, Tick & Mush

This article contains affiliate links. If you buy through them, I earn a small commission at no extra cost to you. I only recommend keyboards I’ve actually tested. As an Amazon Associate I earn from qualifying purchases.
The thing that makes most stock keyboards sound bad isn’t the switches. It’s the stabilizers. Specifically, your spacebar.
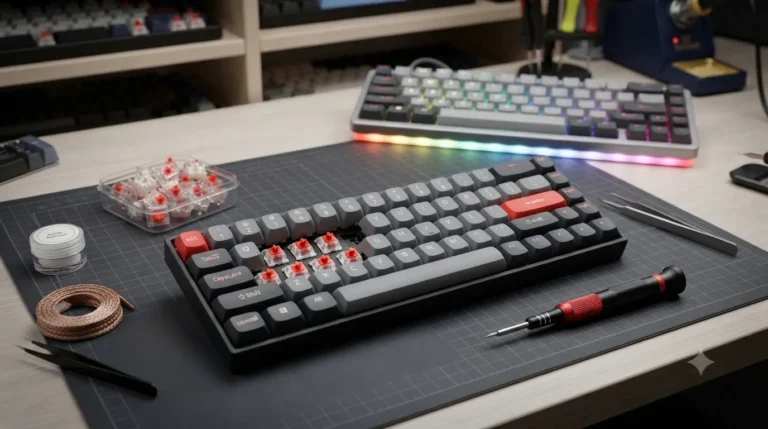
I’ve torn down somewhere north of two hundred boards at this point, and the pattern is brutally consistent: you can drop in the most expensive linears on the planet, but if your stabs are dry, unbalanced, or full of plastic-on-metal tick, your $300 build is going to sound like a $40 office board with extra steps. A proper keyboard stabilizer mod is the single highest-ROI thing you can do to a mechanical keyboard. It costs almost nothing. It takes a Sunday afternoon. And the difference is the kind of thing you actually hear from across the room.
This is the guide I wish someone had handed me back when I was lubing my first Tofu 65 in 2019 and getting it wrong.
Quick Comparison: Best Stabilizers by What You Actually Need
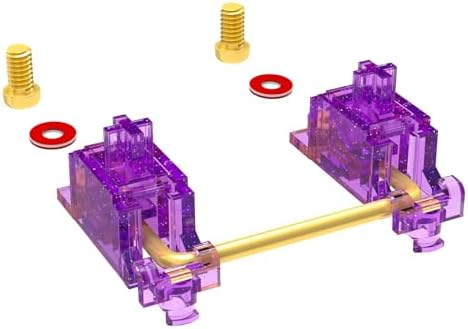
If you’d rather buy a good set than mod what came with your board, here’s the cheat sheet. These are all screw-in or clip-in Cherry-style sets. I won’t recommend Costar anymore unless you have a very specific reason — they’re a hassle and modern alternatives are better in every way.


| Pick | Best For | Type | Why It Wins |
|---|---|---|---|
| Durock V2 Screw-In | Best overall | Screw-in | The current benchmark. Gold-plated wires, almost no slop, sound great after a basic lube job. |
| Gateron Screw-In V2 | Best budget | Screw-in | About half the price of Durock and 90% as good. Solid wires, decent tolerances, easy to mod. |
| C³Equalz x TKC Stabilizers | Best for custom builds | Screw-in | Long-time enthusiast favorite. Very low tick out of the bag and play nice with most boards. |
| Cherry Clip-In | Best drop-in (no modding) | Clip-in | Boring but quiet. If you’ll never lube anything, these are the safest stock option. |
| Everglide Panda V3 | Best for heavy typists | Screw-in | Beefy wires, very stable on long spacebars. Hard to bottom out crooked. |
Stock stabilizers that ship with most prebuilts — Keychron, GMMK, Royal Kludge, Akko, NuPhy — are almost always usable, but never good. Some are downright awful. That’s where modding comes in.
What a Keyboard Stabilizer Mod Actually Fixes
There are four distinct sounds and feels you’re trying to fix, and people lump them all together as “rattle” when they’re not the same problem.
- Tick — the high-pitched metallic ping when the wire snaps back. Wire hitting plastic dry. Lube fixes it.
- Rattle — the loud chattering on spacebar release. Loose wire flopping in the housing. Lube and clipping fix it. Sometimes a holee mod helps.
- Hollow bottom-out — the cheap “thock-but-bad” sound when the housing slaps the PCB. Band-aid mod fixes it.
- Mushy or inconsistent press — usually a bent wire or one side dragging late. A balanced install fixes it.
If you only have a few minutes, just lube. Lubing alone solves probably 70% of stab complaints, and most people who say “modding stabs is hard” have actually never just lubed them properly.
Stabilizer Types Compared
Before you mod anything, make sure you know what’s actually in your board. The mounting style determines what you can do.
| Type | Mounting | Sound Potential | Difficulty to Mod | My Take |
|---|---|---|---|---|
| Screw-in | Screws into PCB | Best | Easy | What you want if your board supports it. |
| Snap-in / Clip-in | Clips into PCB | Very good | Easy | Common on better prebuilts. Fine when installed right. |
| Plate-mount | Clips into plate | Average | Medium | Worse acoustics, but your only option on some boards. |
| Costar | Two-piece wire and housing | Tinny | A nightmare | Avoid. Old Filco and CM Storm boards used these. |
If you’re picking a new keyboard and you care about sound at all, screw-in stabs are non-negotiable. PCB-mount with screws is the only setup where you have full control.
The Band-Aid Mod: Cheap, Ugly, Effective
Yes — like the literal drugstore bandage. Stick a small fabric pad on the PCB right where the stab housing legs bottom out. That’s it. That’s the whole mod.
What it does: softens the impact of the housing slamming into the board, killing that hollow plasticky bottom-out.
What you need:
- Fabric band-aids (not the slick plastic kind — they don’t compress right)
- Scissors
- A pair of tweezers
Cut a band-aid to roughly the footprint of the stab housing legs, peel, and stick. Two pads per stab. Be honest with yourself about whether your board even needs it. Modern stabs with foam mods and PE foam already in the build often don’t, and stacking too much dampening can leave your spacebar feeling dead.
Honest tradeoff: the band-aid mod quiets the bottom-out but also makes the feel slightly softer. If you like a sharp, punchy thock, you might not want it.
The Holee Mod: When It’s Worth It (and When It Isn’t)
The holee mod is a thin strip of fabric threaded through the loop of the stab wire where it meets the stem. The idea is to dampen the tick and reduce wire slop at the contact point.
I’ll be straight with you: the holee mod is overrated in 2025. Stabilizer quality has come a long way. On a modern Durock or C³ set, a careful lube job will out-sound a poorly executed holee mod every time. And a botched holee mod — too much fabric, uneven thickness, glue smeared everywhere — can leave your spacebar feeling scratchy and weird forever.
Where it still earns its keep:
- Old stock stabs from cheap budget boards you can’t replace
- Stabs you can’t replace and that don’t sound right after lubing
- Boards where you specifically want a deeper, dampened spacebar character
If you’re new to modding, skip it. Do the lube job, do the band-aid, see how you feel. The holee mod is the optional final 5%, not a beginner step.
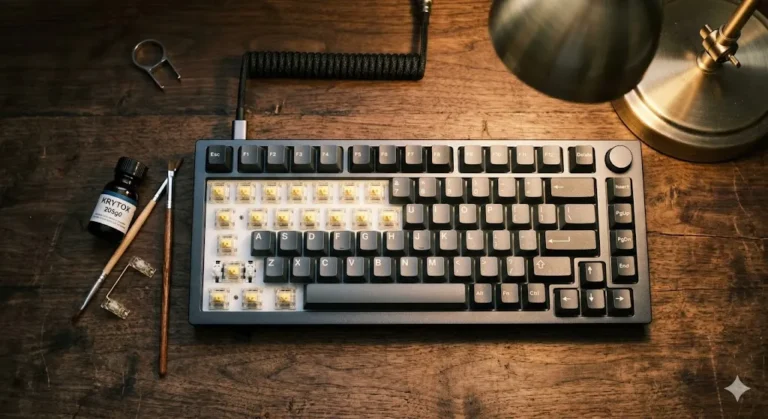
Lubing Stabilizers: What I Actually Use
This is the part everyone screws up. Switch lube and stab lube are not the same thing. Stabs need something thicker because the metal wire is sliding against plastic, and any thin lube will wear off quickly or migrate where you don’t want it.
What I use, and have used on every personal build for the last four years:
- Krytox 205g0 — works in a pinch but a little too thin for stabs on its own
- Krytox XHT-BDZ — thick grease, perfect for the wire ends
- Permatex dielectric grease — controversial, but genuinely fine for stab wires if you’re on a budget. About $5 at any auto parts store.
Where it goes:
- A generous dab on each end of the wire, inside the housing where it pivots
- A thin coat on the inside of the stem where the wire seats
- Nothing on the slider rails — that’s a switch thing, not a stab thing
Use a small paintbrush. Don’t dump it on. Too much lube is worse than too little because it goes mushy, attracts dust, and gunks up the action over time. You want enough to coat the contact points, not drown them.
Clipping and Balanced Installation
Stock Cherry-style stab stems have two little feet on the bottom that hit the PCB before the switch itself bottoms out. Clipping those off — just snip them flush with flush cutters — gives you a deeper, more consistent press because the switch is now doing all the bottoming-out work, not the stab feet hitting plastic. The difference in sound is significant.
Some premium stabs come pre-clipped. Look before you go to town with the cutters or you’ll make a mess of a perfectly good set.
Balanced installation is the unsexy part nobody posts videos of, and it’s where half of all bad-sounding builds quietly go wrong. The steps:
- Insert the wire into both stem housings before mounting them to the PCB.
- Make sure the wire sits flat — no twist, no upward bow, no obvious bend.
- Bend the wire gently if needed. Yes, you’re allowed to do this.
- Mount the stabs to the PCB, drop a keycap on, and test the press. Both sides should bottom out at the exact same instant.
- If one side feels mushy or late, the wire is bent or one housing is sitting crooked. Pull it and redo.
A balanced, well-lubed pair of $8 Gateron screw-ins will outperform a sloppily installed set of $25 boutique stabs every single time. Most “my stabs sound bad” posts on r/MechanicalKeyboards are install problems, not parts problems.
My Verdict After Two Hundred Builds
If you’re typing on a stock prebuilt and the spacebar drives you nuts, here’s exactly what I’d do, in order of effort-to-payoff:
- Just lube — 30 minutes, near-zero risk, fixes most boards.
- Lube plus balanced install — another 20 minutes, fixes the rest.
- Add band-aid mod — only if the bottom-out still sounds hollow afterward.
- Replace the stabs entirely — if your board’s stabs are genuinely bad (looking at you, every $50 RK board on Amazon), don’t waste a Sunday lubing junk. Buy Gateron screw-ins for fifteen bucks and start fresh.
Here’s the catch: not every board lets you do any of this. Plenty of budget keyboards have plate-mount stabs glued in place, or worse, stab components molded into the bottom case. If you can’t get the keycaps off and the stabs out cleanly, the best keyboard stabilizer mod is just buying a hot-swap board next time. Don’t bash your head against a sealed prebuilt.
Don’t overthink it. Don’t buy the boutique fifty-dollar stab set when you haven’t even lubed the ones in your board. And please, ignore anyone telling you their secret holee-mod-plus-tape-mod-plus-PE-foam combo is the only way to get good sound. Most of us got there with a brush, some grease, a few band-aids, and one quiet afternoon.
This article contains affiliate links. If you buy through them, I earn a small commission at no extra cost to you. I only recommend keyboards I’ve actually tested. As an Amazon Associate I earn from qualifying purchases.