Keyboard Foam Mod Guide: PE, Tape, Case & Plate (Tested)

This article contains affiliate links. If you buy through them, I earn a small commission at no extra cost to you. I only recommend keyboards I’ve actually tested. As an Amazon Associate I earn from qualifying purchases.
Most keyboards on a desk right now are louder, hollower, and more rattly than they need to be — and a $4 sheet of foam plus a roll of painter’s tape can fix more of that than another $200 board ever will. That’s not hype. I’ve torn down enough hollow prebuilts over the years to say it with a straight face. A keyboard foam mod isn’t magic, but it’s the closest thing to a free upgrade in this hobby, assuming you pick the right mod for the problem you actually have.
Here’s the catch: not every foam mod helps every board. Some muffle the board to death. Some only matter if there’s a specific kind of empty space inside your case. And some YouTube tutorials are trying to sell you on stacking all four mods at once when honestly, one would’ve done the job.
Let me actually break it down.
Quick Comparison Table (TL;DR by What You Want)
If you skim nothing else, skim this. Each mod earns its place for a different goal — pick the row that matches what you’re chasing.
| Your Goal | Best Mod | Materials Cost | Difficulty | Sound Result |
|---|---|---|---|---|
| Kill hollow “ping” on a budget board | Tape Mod | Under $5 | Easy | Deeper, more closed |
| Get that “marbly/poppy” sound | PE Foam Mod | $8–$15 | Medium | Crisper, bouncier top end |
| Make typing quieter for the office | Plate Foam | $10–$20 | Easy | Muted, softer |
| Deepen the bass in an empty case | Case Foam (EVA/Neoprene) | $10–$25 | Easy | Thicker, fuller bottom end |
| Maximum “thocc” enthusiast combo | PE + Tape + Case Foam | $20–$30 | Medium | Deep, controlled, no ping |
| Already-good prebuilt, light tweak | Tape Mod only | Under $5 | Easy | Subtle deepening |
If you take nothing else from this guide: start with the tape mod, then decide.
What a Keyboard Foam Mod Actually Does
Acoustically, an empty keyboard case is a small echo chamber. Switches make a sharp click or thock at the top of their travel, the stem bottoms out on the housing, and that sound bounces around inside the plastic or aluminum shell of the board. You hear the typing and the resonance — the “ping,” the “hollow rattle,” the cheap-board echo people keep complaining about online.
A foam mod fills in those gaps. Different placements solve different problems. So before you spend a dime, figure out which one actually applies to your board.
The PE Foam Mod (Polyethylene Foam)
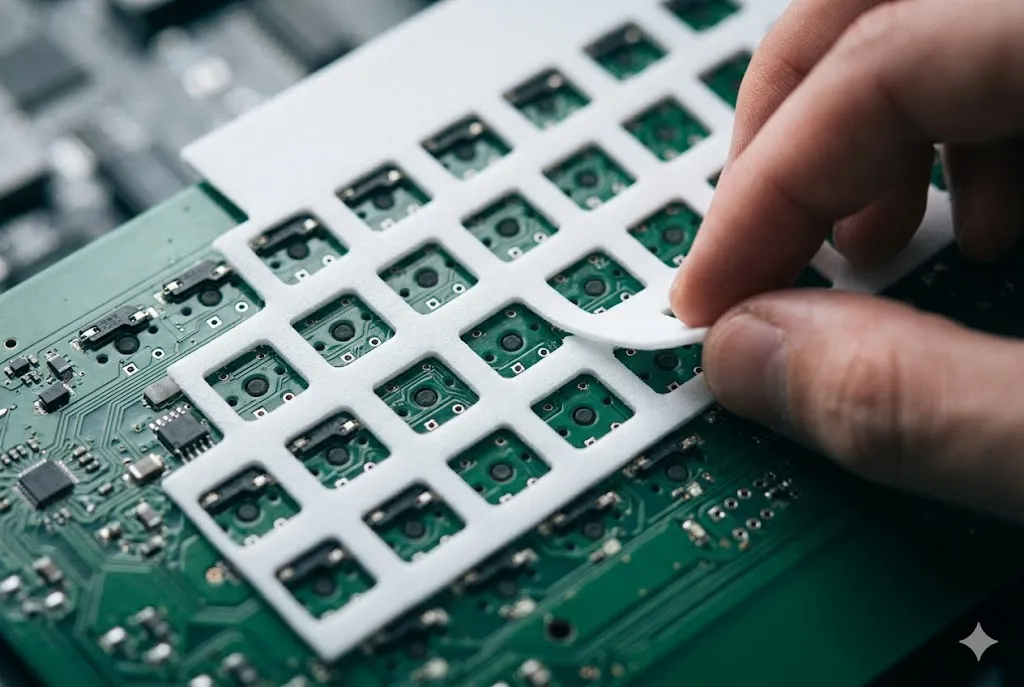
This is the mod that turned into a meme around 2021, and for good reason. It actually works.
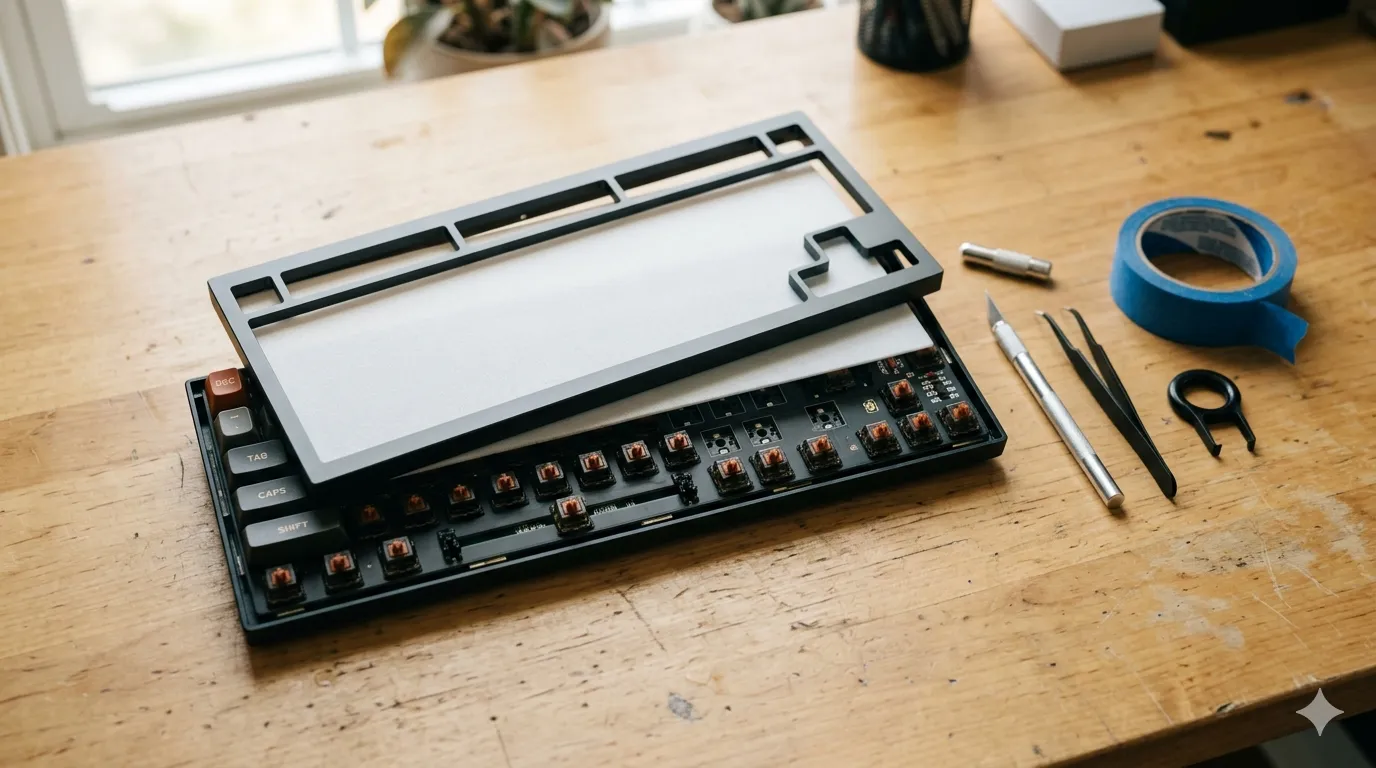
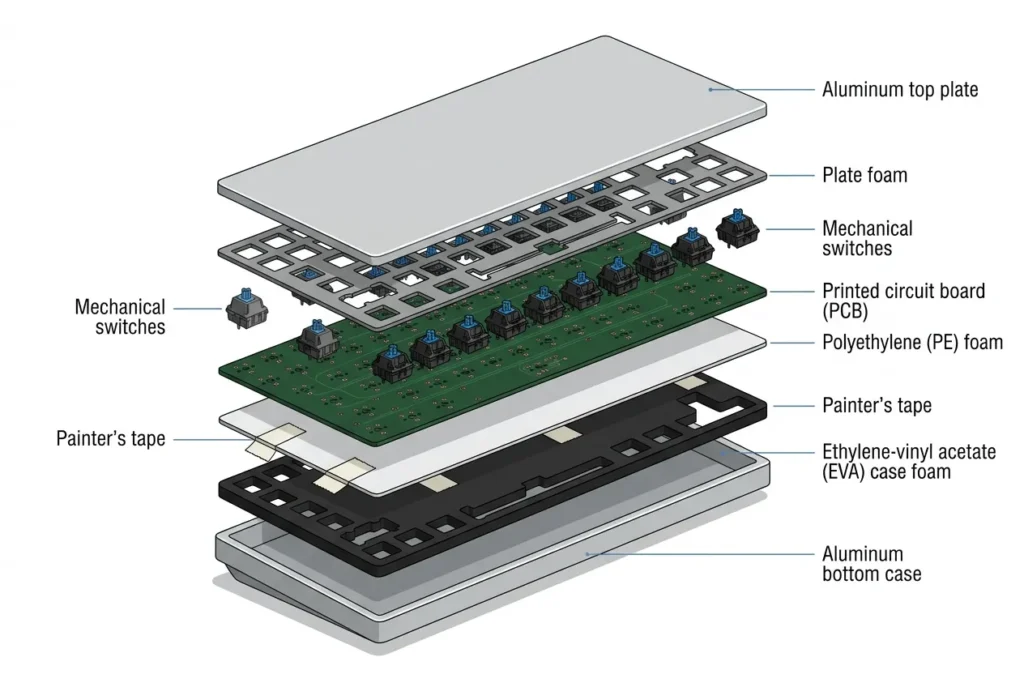
PE foam — a thin sheet of low-density polyethylene, usually 0.5mm to 1mm thick — gets cut to the shape of your PCB and sits between the PCB and the plate. You poke holes for every switch stem, snap it back together, and the switches now bottom out into foam instead of bare PCB. The result is that “marbly,” “poppy,” slightly bouncy sound a lot of custom boards chase.
What I’ve found in actual testing across maybe two dozen boards:
- On hollow boards, it’s transformative. A first-gen GMMK Pro or an entry-level Keychron Q-series gets a real character change.
- On already-dampened boards (anything with a gummy gasket mount and three layers of factory foam), it’s marginal.
- It does not make your board meaningfully quieter. People keep saying it does. It doesn’t — it changes the character of the sound, not the volume.
Most enthusiast vendors sell pre-cut PE sheets for common layouts (KBDfans, NovelKeys, AliExpress sellers). If yours is an odd layout, an 8″ x 11″ sheet of 1mm LDPE foam from Amazon plus a hobby knife is about $8.
Tradeoff: You have to fully disassemble your board, pop every switch out, and align dozens of stem holes. First time, it’s an hour of fiddling. Second time, fifteen minutes.
Case Foam
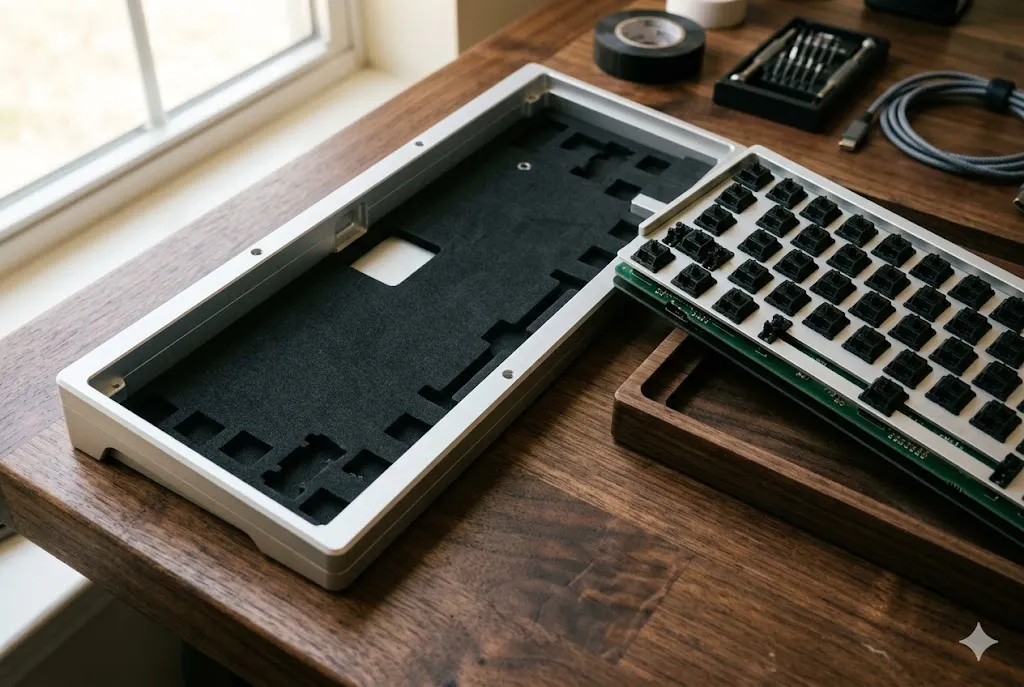
This is the foam that lives at the bottom of the case, between the underside of the PCB and the floor of the chassis. Its job is killing the big echo — the boomy hollowness you hear in cheap plastic cases when you tap on them with your knuckle.
Most modern prebuilts already ship with this installed. Open up a Keychron Q1 V2, an Akko 5075B, or a NuPhy Halo65 and you’ll find an EVA or Poron foam pad already at the bottom. Adding a second layer on top of that rarely helps, and can actually starve the case of the resonance that gives some boards their character.
Case foam is genuinely worth adding when:
- You bought a barebones or vintage aluminum case with nothing inside.
- You’re working with an older budget board that came empty.
- You can hear obvious echo when you tap on the empty case shell.
EVA foam (yes, the same material that’s in yoga mats and packaging inserts) is the standard. Neoprene works too. Poron is the pricier option and absorbs slightly better, but the difference is small enough that I wouldn’t pay double for it.
Plate Foam
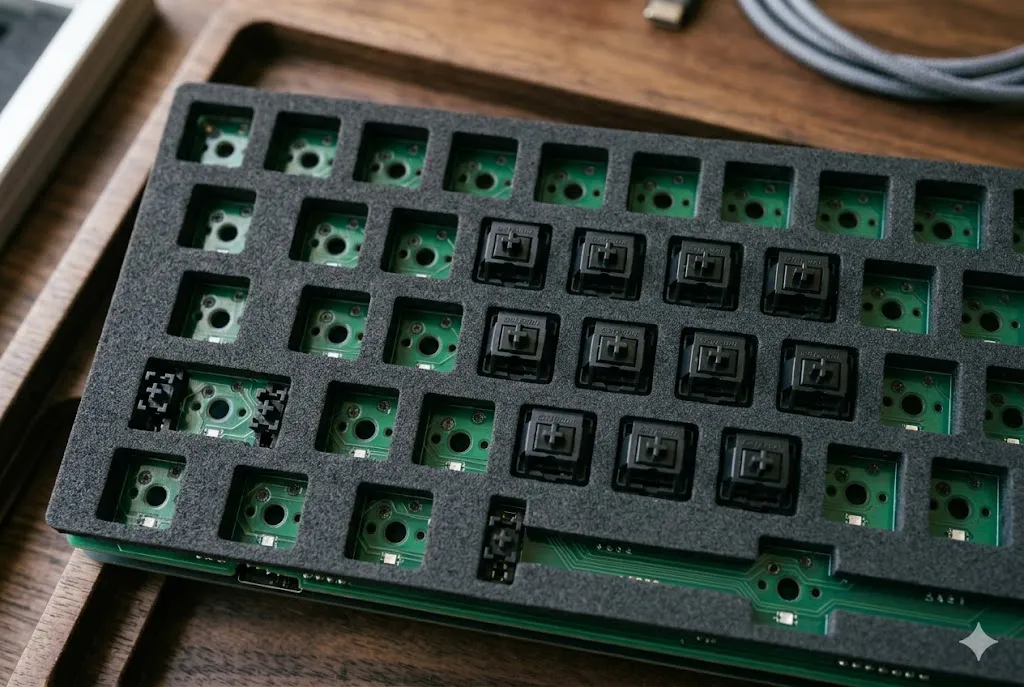
Plate foam sits between the plate and the PCB, with cutouts around every switch. It’s the most aggressive of the bunch — it dampens nearly all switch noise except what escapes from the top of the housing.
I’ll be honest: I take plate foam out of more boards than I put it in. A lot of factory boards ship with plate foam preinstalled because it makes the board sound consistent across cheap and expensive switches, which is great for marketing and terrible for typing personality. Pull it out and a flat, muffled board often suddenly has bass and definition again.
Plate foam is the right move when:
- You work in an open office and you genuinely need the board quieter.
- You’re running clicky switches (Kailh Box Jade, Cherry MX Blue) and want to tone them down without going full membrane.
- Your case is too small to fit case foam comfortably and you still want some dampening.
If you’re already adding PE foam and tape, skip plate foam. It’ll muffle everything you just paid to add.
The Tape Mod
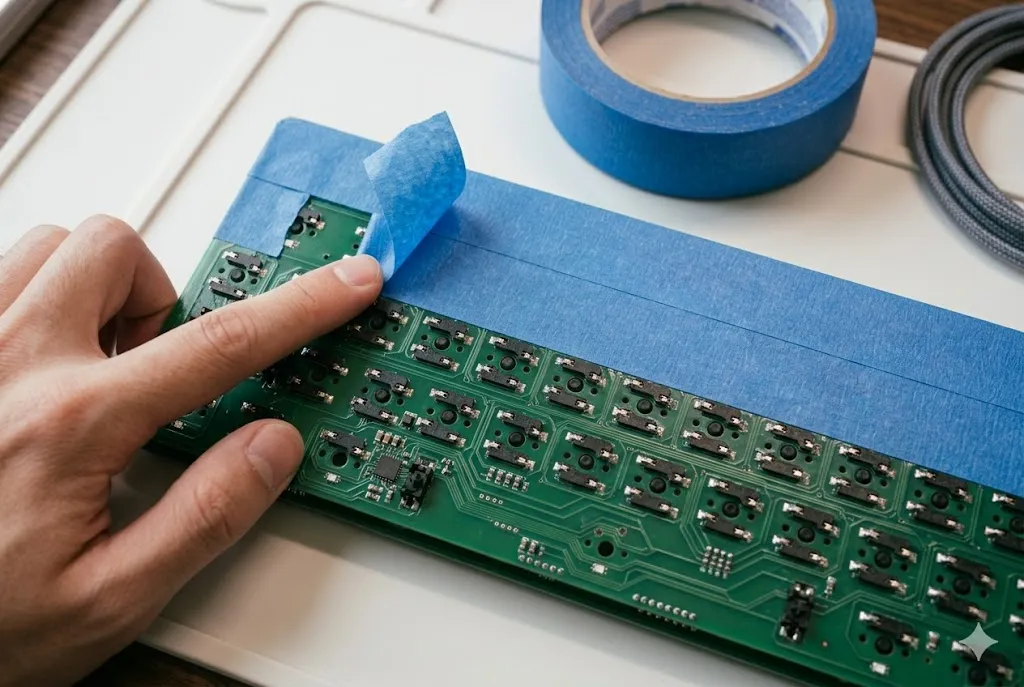
If the keyboard foam mod world had a cheaper, scrappier cousin, this is it. The tape mod is exactly what it sounds like: you stick two or three layers of painter’s tape (or standard scotch tape) across the back of the PCB. That’s it. About 40 cents in materials.
What it does is create a more closed acoustic chamber underneath the PCB. Sound that would otherwise dissipate into the case bounces back up, and the board takes on a deeper, more controlled signature. It’s famous for a reason — for the price of basically nothing, on the right board, it’s the single highest bang-for-buck change you can make.
Layer count rules of thumb from my own testing:
- 1 layer: Subtle deepening. Hard to notice without a reference recording.
- 2 layers: The sweet spot for most boards. Noticeable improvement, no real downside.
- 3 layers: Now you’re in it. Deeper still, but on hot-swap PCBs you can occasionally interfere with switch seating if the tape’s thick.
- 4+ layers: Skip. Diminishing returns and you’re inviting connection issues.
Use blue painter’s tape, not duct tape. Duct tape leaves residue and gets sticky in warm rooms. Ask me how I know — I’ve got a Tada68 that took me two hours to clean.
Combinations That Actually Work
This is where it gets interesting. Stacked correctly, foam mods compound. Stacked wrong, they kill the board’s personality.
| Combo | Best For | Sound Result | My Verdict |
|---|---|---|---|
| Tape Mod only | Cheap or budget boards | Deeper, controlled | Best ROI mod, period. Try this first. |
| PE + Tape | Hollow mid-range boards | Marbly, deep, no ping | The classic enthusiast pairing. Hard to beat. |
| Case Foam + Tape | Empty aluminum cases | Full, thick, no echo | Solid for vintage/barebones builds. |
| PE + Case + Tape | Maximum sound tuning | Deep, rich, poppy top | The “full mod” most YouTubers chase. |
| PE + Plate + Case + Tape | Office-quiet typing | Muted, dampened | Too damped for most. Only if quiet is priority. |
| Plate Foam only | Loud clicky switches in shared spaces | Quieter, softer | Useful but not exciting. |
The combo I run on my personal daily driver — a modded Tofu60 with lubed Gateron Yellows — is PE foam plus two layers of painter’s tape. That’s it. No plate foam, no extra case foam. It sounds better than most $400 boards I’ve reviewed in the last year. That’s not a brag — it’s just how much sound mods matter on a well-built base.
The Honest Caveats
A few things nobody selling foam kits wants to say out loud:
- Bad switches will sound bad through any mod. Scratchy unlubed linears and rattly stabilizers won’t get rescued by foam. Fix those first. A $90 board with properly lubed stabs and decent switches will outclass a $250 hollow board no matter how much foam you cram in.
- Some boards are better off untouched. Mode SixtyFive, Wuque Studio Mammoth75, Bauer Lite — modern customs are dialed in out of the factory. Adding foam to those often makes them worse, not better.
- Sound is subjective. What I call “marbly,” another reviewer calls “thin.” Listen to YouTube sound tests of the same board you own before deciding a mod is right for you.
So What Should You Actually Do?
If you’ve got a hollow-sounding board and forty bucks burning a hole in your pocket, here’s my tested order of operations for a keyboard foam mod:
- Two layers of blue painter’s tape on the back of the PCB. Costs nothing. Try it for a week. Decide if you want more.
- Still chasing it? Add a PE foam sheet under the plate. Pre-cut sheets for common layouts are on KBDfans, AliExpress, or Amazon for $8–$15.
- Only if you hear obvious echo from an empty case, add case foam. EVA is fine.
- Skip plate foam unless quiet is the goal. It’s a muffler, not a tuner.
A good keyboard foam mod won’t turn a $40 Redragon into a boutique build. But it’ll get you most of the way to the sound enthusiasts pay flagship prices for — and the rest is switches, stabilizer tuning, and keycap choice, not more foam.
The hobby’s full of expensive ways to get marginal gains. This is one of the rare cheap ones that actually delivers. Tape mod first. Then decide if you even need anything else.
This article contains affiliate links. If you buy through them, I earn a small commission at no extra cost to you. I only recommend keyboards I’ve actually tested. As an Amazon Associate I earn from qualifying purchases.