How to Mod a TKL Keyboard: Lube, Foam & Tape That Work
This article contains affiliate links. If you buy through them, I earn a small commission at no extra cost to you. I only recommend keyboards I’ve actually tested. As an Amazon Associate I earn from qualifying purchases.
There’s a version of this article on every keyboard blog where every mod is worth doing, every YouTuber’s technique is essential, and you end up with $180 in lube, foam, and tape sitting on a $95 board. That’s not how I’ve done it. Over the last decade I’ve torn down enough TKLs — Ducky Ones, Keychron Q3s, GMMK Pros, no-name aluminum kits — to know which mods actually change how a board sounds and feels, and which ones are enthusiast theater.
If you’re wondering how to mod a TKL keyboard without wasting money or a Saturday, this is the honest version. The mods below are ranked by how much they change the sound per hour of work — not by what looks impressive in a slow-mo sound test.
Quick Comparison: Which TKL Mod Should You Actually Do?
Here’s the TL;DR. If you only do one row from this table, do the first. Everything after it stacks in order of value.
| If your board… | Do this mod | Cost | Time | What you need |
|---|---|---|---|---|
| Sounds rattly or ticky | Stabilizer fix | $10–$15 | 30–45 min | Dielectric grease + Krytox 205g0 |
| Sounds thin or “clacky” | PE foam mod | $8 | 20 min | 1mm PE foam sheet |
| Has a hollow echo | Case foam | $10 | 10 min | EVA foam or silicone pad |
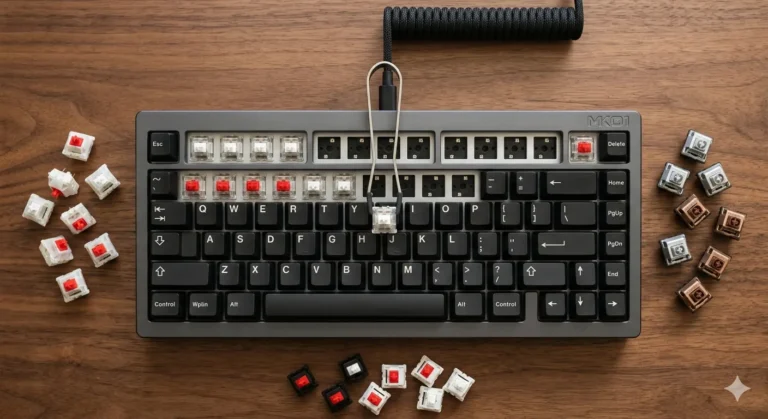
| Has scratchy linears | Lube each switch | $20–$30 | 2–3 hours | Krytox 205g0, brush, opener |
| You’re modding on a budget | Tape mod | $2 | 15 min | Blue painter’s tape |
| Feels harsh on your wrists | Softer mount tweak | $8 | 20 min | Poron strips or plate-mount o-rings |
Prices assume US retail from KBDfans, Divinikey, or Amazon. Any decent pre-built TKL worth modding will accept most of this without a fight — hot-swap is the one big prerequisite for a couple of these mods.
1. Fix the Stabilizers First — Nothing Else Matters More
This is the mod. If you do nothing else on this list, do this one.
Rattly stabilizers ruin more TKLs than bad switches ever have. Your spacebar, Enter, Backspace, and both Shifts all ride on stabs, and stock stabilizers — even on $150 boards — tend to tick, rattle, or ping. Fixing them is the single biggest before-and-after change you’ll ever hear on a TKL.
Here’s the process I use every time:
- Pull the keycaps and switches off the stabilized keys.
- Remove the stabilizers from the PCB (or the plate, depending on your board).
- Clip the little plastic feet off the bottom of each stem with flush cutters. That alone kills the mushy bottom-out.
- Apply a thin layer of dielectric grease to the wire ends — where the wire clips into the housing. That’s where 90% of the ticking comes from.
- Brush a light coat of Krytox 205g0 inside the stem housing where the stem slides.
- Reassemble, reinstall, then press the corners of each stabilized key to make sure the wire is seated cleanly.
You don’t need a $40 “premium stabilizer kit” to get good results. Cherry-clip stabs, Durock V2s, and even the stock stabs on most Keychrons all clean up beautifully with clipping and lubing. Here’s the catch: if your wires are visibly bent or the housing is warped, no amount of lube saves them. Replace the wire first. A set of pre-bent wires costs about $3.
Verdict: mandatory. Anyone showing you how to mod a TKL keyboard who skips this step is wasting your time.
2. Lube the Switches (If They’re Linear, and If They’re Not Already Lubed)
Now for the mod everyone talks about — and half the people do wrong.
Lubing linear switches like Gateron Yellows, Cherry MX Reds, or Akko CS Silvers takes them from “scratchy and slightly hollow” to “smooth and creamy.” I’ve done full boards of Yellows straight out of the bag versus fully lubed, and the difference is real. Not life-changing. But real.
What you need:
- Krytox 205g0 for linears. This is the standard, don’t fight it.
- A small paint brush, size 000 or 00.
- A switch opener (JWICK or KeebsForAll ones run about $8).
- Two to three hours of patience if you’re doing a full TKL.
Skip Krytox 205g0 on Tactile Switches
Bumpy switches — Boba U4Ts, Holy Pandas, Zealios — get gummed up by 205g0 and lose their tactile character. Use Krytox 3204 or Tribosys 3203 on those, and go light. In my testing, an over-lubed tactile feels worse than a stock one every single time.
Honest caveat: if your switches are pre-lubed from the factory (most Gateron KS-3, Kailh Box, and modern Cherry MX are), the return on lubing them yourself is much smaller. On a modern budget board, I’d skip switch lubing entirely and go straight to the foam mods.
3. Case Foam: Kill the Hollow Sound
Open up almost any pre-built TKL and you’ll see it — a big empty aluminum or plastic cavity under the PCB. That empty space is where the “ping” and the echo come from when you type.
Case foam sits at the bottom of that cavity and absorbs the reflected sound. Three options, in order of effort:
- Cut-to-fit EVA foam — cheapest, works fine. Any 3mm sheet from Amazon does the job.
- Silicone dampening pad — heavier, sounds deeper, slightly pricier.
- Non-slip shelf liner — the meme option that actually works. Dollar store shelf liner cut to shape. I’ve used it on three boards. It costs nothing and it genuinely deadens the case ring.
You’ll hear the difference immediately. A hollow-sounding aluminum TKL turns into something noticeably fuller. This is the second-most-effective mod on the list after the stab fix, and it takes ten minutes.
4. PE Foam Mod: The “Marbly” Sound Everyone Wants
This is the mod that turned “thocc” from a meme into a technique.
A thin sheet of polyethylene foam (1mm) sits between the switches and the PCB, with holes punched out for each switch. What it does: it dampens the high-frequency bounce off the PCB and gives the board that dense, marbly, typing-into-a-cardboard-box quality you’ve heard on every YouTube sound test since 2022.
How to do it:
- Buy a pre-cut PE foam sheet for your specific TKL layout, or buy a raw sheet and use a hole punch.
- If your board isn’t hot-swap, desolder the switches. Groan, I know.
- Lay the PE foam over the PCB, aligning the switch holes.
- Reinstall the switches through the foam and back into the sockets.
Is PE Foam Really Worth Desoldering For?
Honest answer: probably not, if that’s what it takes. YouTube sound tests are recorded with a mic six inches from the board in a quiet room. From your ears, at typing distance, the PE foam mod is a nice bass boost — not a transformation. It stacks well with stab lube and case foam, but it’s not the mod that saves a bad board.
If your board is hot-swap? Absolutely do it. Twenty minutes of work and you get a noticeably fuller sound.
If your board is soldered? Skip it. The other four mods on this list will get you 80% of the way there without ever touching a soldering iron.
5. Tape Mod: Cheap, Controversial, and It Actually Works
The tape mod is exactly what it sounds like. You stick two or three layers of painter’s tape on the back of the PCB. That’s the whole mod.
The theory: sound waves bouncing off the underside of the PCB get muted by the tape layers, giving you a slightly deeper, more focused sound. Enthusiasts argued about it for a year. Then they mostly agreed it works — but only a little.
My take after doing it on four boards: you can hear it if you’re listening for it. It’s not a myth. But it’s the smallest of the sound mods, and it undoes cleanly if you don’t like it. For $2 in tape it’s worth trying once. Just don’t expect a transformation.
One important note: use blue painter’s tape, not duct tape. Duct tape leaves residue and can behave weirdly on solder joints. Not a risk worth taking on a $200 board.
6. The TKL Mods I’d Skip
Since this article is called how to mod a TKL keyboard — not how to spend $300 on marginal gains — here’s what I don’t bother with anymore:
- Force break mod. Snapping the plate on either side of the spacebar. This was meaningful on cheap tray-mount boards from 2018. On a modern gasket-mount TKL, it’s pointless.
- Full switch films. Tiny plastic gaskets between the top and bottom of each switch housing. In my testing, they help maybe 5% of switches audibly, and they’re a huge time sink. If your switches wobble visibly, sure. Otherwise skip.
- O-rings on every keycap. Muffles the sound you just spent all day building. Only useful if you specifically want a quieter, softer feel — say, for a shared office.
- Any “premium modding kit” over $80. You’re paying $50 for packaging. Buy the parts separately.
How to Mod a TKL Keyboard in the Right Order
If you’re modding a TKL from scratch, this is the order that gets you the best sound-per-hour ratio:
- Lube and clip the stabilizers.
- Drop case foam at the bottom of the case.
- Lube linear switches (skip if pre-lubed or tactile).
- PE foam mod between switches and PCB (only if hot-swap).
- Tape mod on the back of the PCB.
- Reassemble, then live with the board for a week before doing anything else.
That last step is the one people skip. Half the “problems” you think a modded board has go away after a few days of typing on it and letting your ears adjust. Don’t panic-tear it back down after one evening.
One Honest Verdict Before You Grab a Screwdriver
Not every TKL is worth modding. If you’ve got a $60 pre-built with a plastic case, soldered switches, and no hot-swap sockets, you’ll drop $40 in mods and still have a $60-sounding board. That money is better saved toward a hot-swap board with a decent case — something you can mod repeatedly as your taste changes.
But if you’ve already got a solid TKL on your desk and the stabs rattle, the case pings, or the whole thing sounds hollow? Yeah. Do the stab fix this weekend. Add case foam next weekend. That’s a two-hour, $25 investment that’ll change how the board sounds every day for years.
Skip the $200 kits. Skip the arguments on Reddit about whether tape mod is real. Fix the stabs, dampen the case, and let your ears — not a YouTube sound test — tell you when it’s done.
This article contains affiliate links. If you buy through them, I earn a small commission at no extra cost to you. I only recommend keyboards I’ve actually tested. As an Amazon Associate I earn from qualifying purchases.

I’ve torn down, lubed, and rebuilt several hundred keyboards — from $20 membranes to $800 enthusiast boards. I review them honestly, even when “honestly” means telling you to skip the one with the bigger marketing budget.